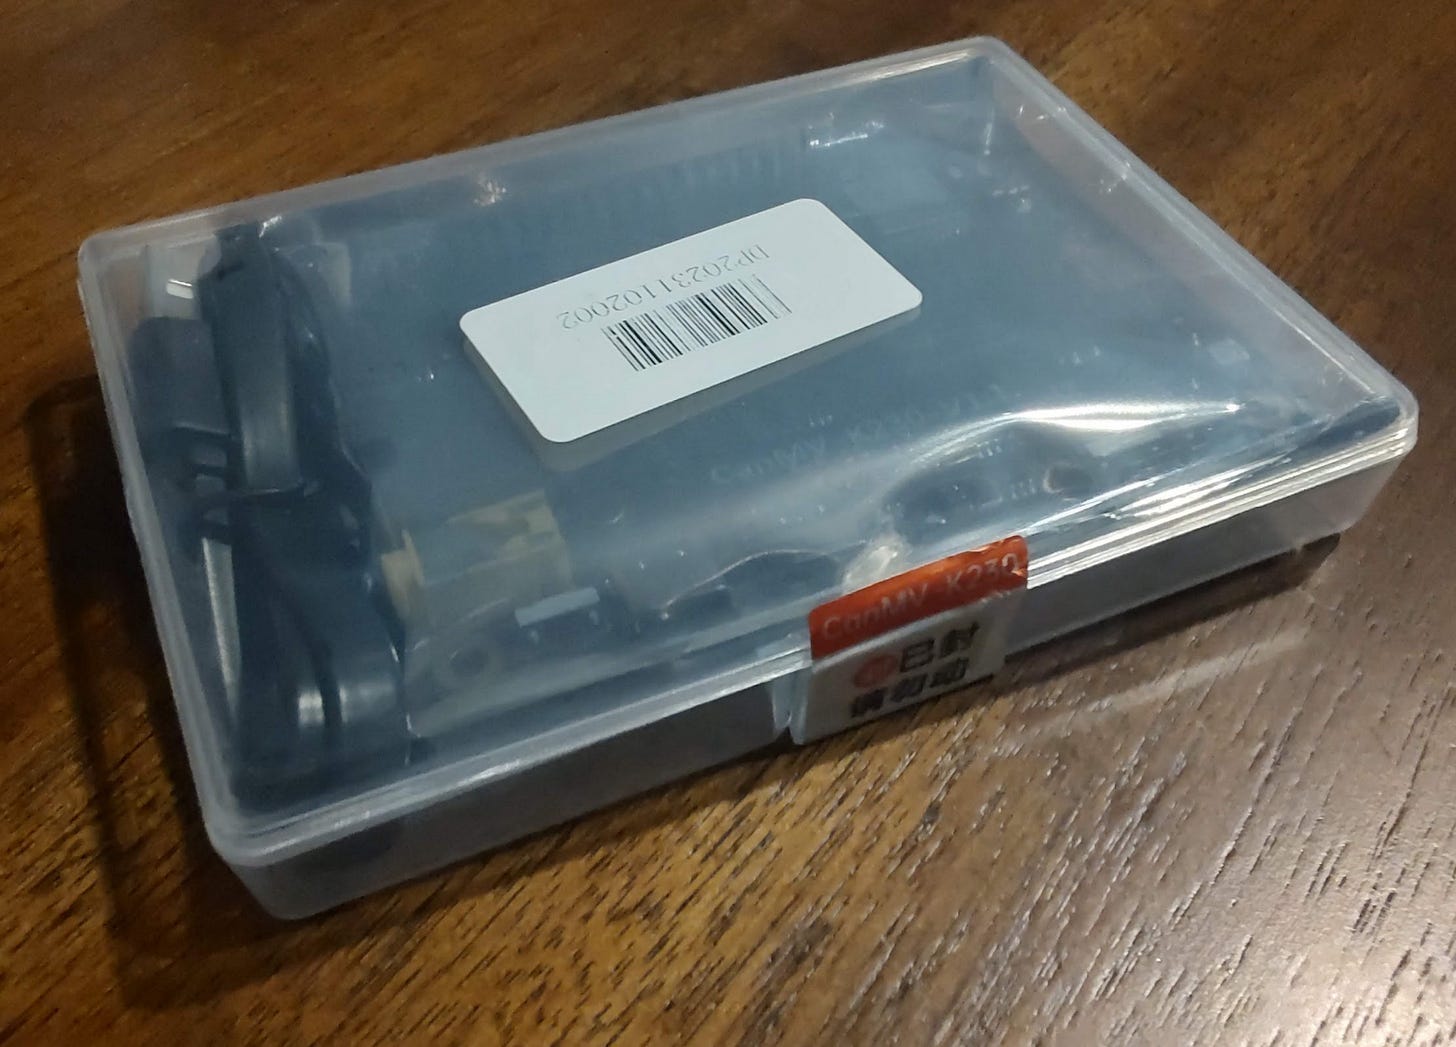
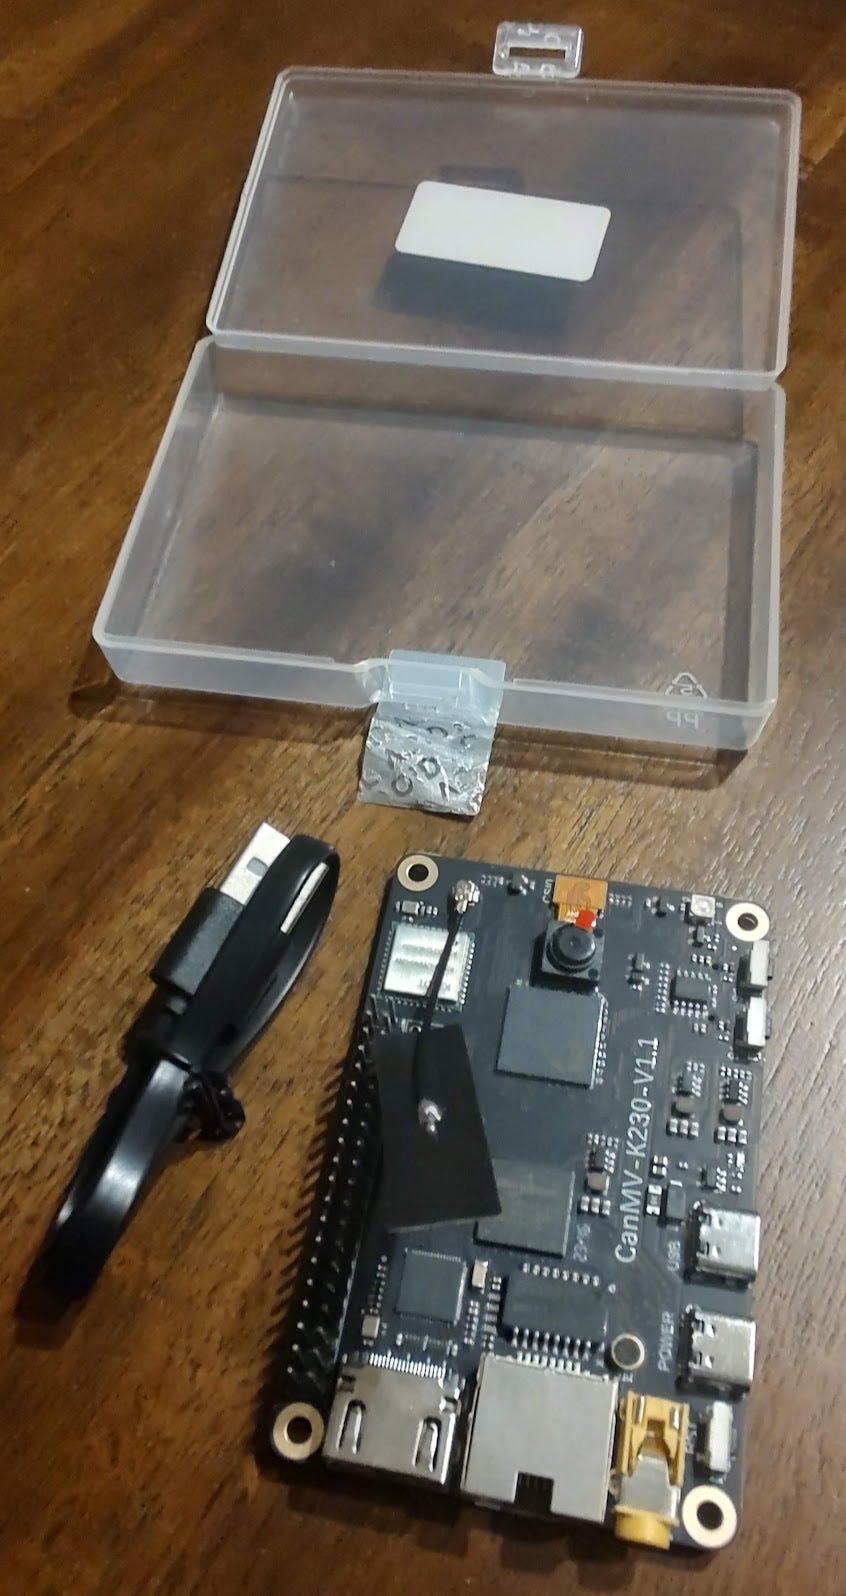
Unpacking the CanMV K230 RISC-V board
A mini computer with full RISC-V Vector 1.0 Support
RISC-V ISA is almost 15-year old and RISC-V hardware has been popping up regularly for a while. Until recently it was difficult to find a board with RISC-V Vector support, in particular ratified RVV 1.0 support (there have been a few earlier products with RVV 0.7 support but they are not compatible with the ratified version of the specification). This is changing and numerous RVV 1.0 boards have started to appear. In this post I am going to tell you about my initial experience using one of those RVV 1.0 boards: the Canaan Creative’s CanMV K230 board (released end of 2023).
The CanMV is available online for around 40$ (I ordered mine from a famous Chinese website but I have noticed some listings on Amazon) so it is rather cheap and easy to get.
For reference my host machine (used to communicate with the board) is a Mac (Apple Silicon) and I am also using a GNU/Linux machine (Ubuntu) to write files into the system SD-card.
I selected the bare version: the board is delivered in a transparent plastic case (for transport) with only a USB-A to USB-C connector (the board has two USB-C connectors).
In my case, 3 extra pieces of hardware were required:
a USB-C to USB-C cable to connect to my host machine (which has no USB-A nor USB 3.0 ports)
an empty SD card (for the system image).
an ethernet cable (to connect the board to a router).
Board architecture
The CanMV board is a rather complete mini-computer, boasting:
A Kendryte K230 SoC with a 2-core RISC-V CPU, a GPU and multiple accelerators
Two USB-C connections (one is for power)
A HDMI port
A RJ45 ethernet connector
A camera
Quite a few other peripherals
The full datasheet is accessible on Canaan website: https://developer.canaan-creative.com/k230/dev/zh/00_hardware/K230_datasheet.html
CPUs
The SoC contains a 2-core CPU, those core are instances of T-Head C908. This core was rapidly presented on a RISC-V blog post: https://riscv.org/blog/2022/11/xuantie-c908-high-performance-risc-v-processor-catered-to-aiot-industry-chang-liu-alibaba-cloud/. More information can be found in this section of the datasheet.
One of the core runs at up to 0.8 Ghz and does not support RISC-V vectors and the second core runs at up to 1.6 Ghz and implements full RVV 1.0 support. The implementation features 128-bit wide vectors (VLEN=128).
The default board system (a camera based AI demo) boots a different OS on each core.
Flashing and Booting
The default application for the board seems to be an image recognition demo, I have to admit this demo is of little interest to me;I am interested in booting and playing with a bare bone Linux system. We are going to use an other official image: the debian image. Canaan offers multiple software images to be used on the board, they can be downloaded from https://kendryte-download.canaan-creative.com/developer/k230/.
Note: I also tried the demo image and the ubuntu image. On the ubuntu image I could not get the ethernet to work so I switched to the official debian image which seems to be the most stable for me. The reference section at the end of this post lists a few interesting links if you want to go beyond using the official images.
Flashing a system image on an SD card
We are going to write the Debian image to an SD card. The commands used are inspired from Canaan official documentation, K230_SDK_Instructions.md#51-sd-card-image-flashing, and from how-to-create-disk-image-on-mac-os-x-with-dd-command/ (for Mac-OS X).
The following command will write some data on the SD card at the block device level, be very careful how you use it, in particular the value of the /dev/<SDcard> of parameter (you want to avoid overwriting a partition on a device you care about). Using a dispensable setup or doing a proper backup beforehand is highly recommended, execute at your own risk (as any command in this post) !
# the image file is obtained by decompressing
# the archive canmv_debian_sdcard_sdk_1.3.img.gz
sudo dd if=canmv_debian_sdcard_sdk_1.3.img of=/dev/<SDcard> bs=1M oflag=sync
Note: The actual value of
/dev/<SDcard>is setup dependent. On MacOS-X, you can usediskutils listto discover the actual device corresponding to your SD card (for example by comparing the list before and after plugging the SD-card).
Note: the default configuration of the official image only allocates a small partition for the main root filesystem. You can refer to this reddit comment by
to extend the file system to the available space on your SD card.
Booting the system and terminal access
Once the SD card is ready we can insert it into the reader located on the bottom side of the CanMV board. Now we can connect a USB-C cable to the power connection of the board and to our host computer: power and serial connection will be done through this single connection.
We are going to communicate with the board system using a serial connection over USB by using the following command (once again the actual path to your device will vary, see note below):
screen /dev/tty.usbmodem588D0609971 115200Note: the actual path for the tty device will vary. You can check before/after connecting the board to your host computer to see which devices have appeared. On Linux, the devices generally appear as
/dev/ttyACM0and/dev/ttyACM1.
The following (or something close) should appear on your terminal (if you connect soon enough you can even witness the Linux boot process):
Debian GNU/Linux trixie/sid v ttyS0

v login:
Debian GNU/Linux trixie/sid v hvc0

v login:
login and password are both set to root by default on this official debian image. Entering those should allow you to login:
Debian GNU/Linux trixie/sid v ttyS0

v login:
Debian GNU/Linux trixie/sid v hvc0

v login: root
Password:
Linux v 5.10.4 #1 SMP Thu Jan 11 19:05:37 CST 2024 riscv64

The programs included with the Debian GNU/Linux system are free software;
the exact distribution terms for each program are described in the
individual files in /usr/share/doc/*/copyright.

Debian GNU/Linux comes with ABSOLUTELY NO WARRANTY, to the extent
permitted by applicable law.
Last login: Sat Jan  6 15:22:34 UTC 2024 on ttyS0
root@v:~# cat /proc/cpuinfo
processor       : 0
hart            : 0
isa             : rv64imafdcvxthead
mmu             : sv39
Contrary to what the display indicates, I did not start using this board on January 6th 2024 :-). The date is simply not set properly. https://www.remlab.net/op/k230-canmv-debian.shtml has a niece little piece of javascript to get the data -s <value> command to fix the date.
K230 Software Development Kit
Now that we have a working system running on the board we can try to build our own small example. To do so, we are going to use the official SDK on our host machine (not on the CanMV). The tutorial describing SDK install and use is available here: CanMV_K230_Tutorial.md#development-environment-setup.
git clone https://github.com/kendryte/k230_sdk.git
cd k230_sdk
# toolchain download
source tools/get_download_url.sh && make prepare_sourcecode
Official tutorial: tutorials/K230_Practical_Basics_hello_world.md
The SDK is only designed to work on x86_64 (with even some i386 part). To get it to (partially) work on Apple Silicon I modified the docker build command by adding —-platform=linux/amd64.
docker build --platform=linux/amd64 -f tools/docker/Dockerfile \
             -t k230_docker tools/docker
Building Hello World
We are going to build a very simple Hello World example using the toolchain built within the docker container. Let’s copy the following code into a hello.c file in the k230_sdk directory:
#include <stdio.h>

int main(void) {
    printf("Hello RISC-V (Vector) World !\n);
    return 0;
}
To start the container I used to following option for the docker run command (the commad should be executed from the k230_sdk directory so the content of the directory is accessible from inside the container):
docker run -u root -it -v $(pwd):$(pwd) -v $(pwd)/toolchain:/opt/toolchain -w $(pwd) k230_docker /bin/bashInside the container, let’s use the official toolchain to build a binary from our source file:
./toolchain/Xuantie-900-gcc-linux-5.10.4-glibc-x86_64-V2.6.0/bin/riscv64-unknown-linux-gnu-gcc -march=rv64gcv_zfh_zba_zbb_zbs hello.c -o hello.out The binary should be available outside of the container, under ./k230_sdk/hello.out, (because it was created in a docker volume shared between the container and the host system).
Executing our first program on the CanMV
Now that we have build the example binary on our host machine we need to copy it to the SD-Card image file system. This seems to be a bit tricky from a MAC Host. The SD card root filesystem uses ext4 filesystem and there is no native solution to write files to such a partition from MacOS. Some third-party applications exists (for a fee). I use another solution: an old laptop under Linux with a SD Card slot (less than ideal but it does the job).
We just have to copy the hello.bin binary file inside the rootfs, for example in the /home directory.
Then we can boot the SD card, login and launch our binary:
root@v:~# /home/hello.out
Hello RISC-V (Vector) World !
Quick and Dirty K230 Benchmarking
Let’s play around and try to evaluate the CPU performance by building and executing Dhrystone on the K230. Dhrystone is an old benchmark which is very lightweight and easy to port to new platform.
We can download and build this benchmark inside the SDK container (on the host machine):
mkdir dhrystone
cd dhrystone
wget https://www.netlib.org/benchmark/dhry-c
sh dhry-c
../toolchain/Xuantie-900-gcc-linux-5.10.4-glibc-x86_64-V2.6.0/bin/riscv64-unknown-linux-gnu-gcc -march=rv64gcv_zfh_zba_zbb_zbs  dhry_1.c dhry_2.c -DTIME -I./ -o dhry.bin
Then copy the file dhry.bin to the SD-card, fire-up the board, open our serial connection, log in and launch the binary. It will prompt for a number of iterations, I entered 100000000:
root@v:/home/benchmarks# ./dhry.bin

Dhrystone Benchmark, Version 2.1 (Language: C)

Program compiled without 'register' attribute

Please give the number of runs through the benchmark: 100000000

Execution starts, 100000000 runs through Dhrystone

(... log shortened for brevity ...)
Enum_Loc:            1
        should be:   1
Str_1_Loc:           DHRYSTONE PROGRAM, 1'ST STRING
        should be:   DHRYSTONE PROGRAM, 1'ST STRING
Str_2_Loc:           DHRYSTONE PROGRAM, 2'ND STRING
        should be:   DHRYSTONE PROGRAM, 2'ND STRING

Microseconds for one run through Dhrystone:    0.6
Dhrystones per Second:                      1818181.9
If you are interested in a more thorough benchmarking of the K230,
provided much more comprehensive benchmark results (including vector capabilities) of the CanMV’s K230: https://camel-cdr.github.io/rvv-bench-results/canmv_k230/index.htmlConclusion
Overall, this initial unpacking of Canaan CanMV K230 board was a great experience. I am amazed at how far RISC-V has gone and I am eager to start developing and running my RISC-V Vector software on the board (more on that in a future post), although I would like to see boards with more performant cores (from SiFive for example).
The experience was not perfect and I still have a lot of things I would like to do with the board. For example, initially I did not manage to install any new debian packages on the board (the package list retrieved with an apt update was corrupted each time I tried, before it finally started working recently well after this blog post was started) and this is definitely something that I would like to use going forward: it would allow me to install anything on the board system, including ssh (remote connection / file transfer) or a GNU toolchain (local binary build …). I have add some issues with the ethernet connections (in particular after package upgrades). I have barely scratched the surface of the board but I hope this post will help some of you try it out (or another board) and share your experience.
Special thanks to who (without knowing) provided very useful resources to make this unpacking less painful.
Resources:
Common resources to begin with the board:
Official repo for english documentation https://github.com/kendryte/k230_docs/tree/main/en
How to write the disk image onto a SDCard (on MacOS-X): https://www.cyberciti.biz/faq/how-to-create-disk-image-on-mac-os-x-with-dd-command/
Other useful (more advanced) links:
How to install your own version of Debian on the board: https://www.remlab.net/op/k230-canmv-debian.shtml
Common benchmarking effort: https://github.com/camel-cdr/rvv-bench/issues/4
Camel-CDR’s benchmarks https://camel-cdr.github.io/rvv-bench-results/canmv_k230/index.html


Any idea re power consumption? Do you know if K230 has suspend-to-ram option?